

Keep reading..
1) Go here or any other site you find brushes on and download the brush you want.
HOW TO INSTALL CUSTOM BRUSHES
Windows: Place the *.abr files into:
Program Files\Adobe\Photoshop Elements X\Presets\Brushes where X is the version number for your version of Photoshop Elements.
Mac: Place the *.abr files into:
Applications/Adobe Photoshop Elements 6/Presets/Brushes
You will need to restart photoshop after you're done with this step.
2) Open your image in photoshop.
3) Select the "brush" tool.
4) Select the brush you want to use.
How to load a brush:
1) Click on the brush
2) Click on the forward arrows
3) Click on "load brushes"
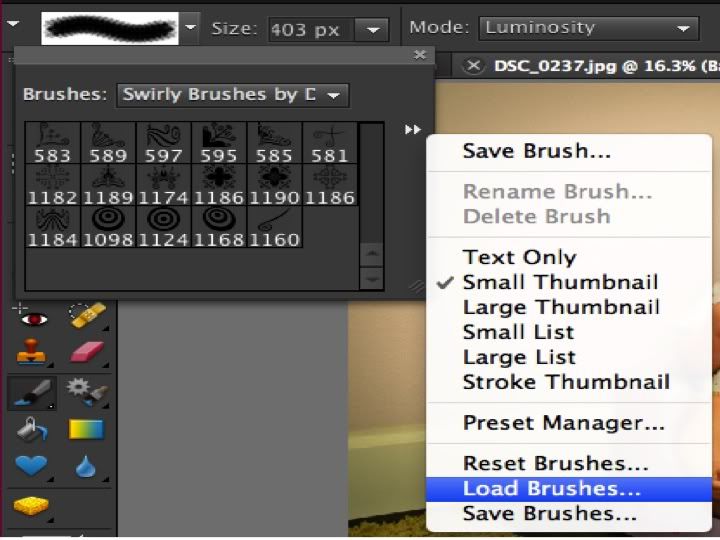
4)Find where you saved your brushes (step #1)
TA-DA You now have your new brush!
5) Change the size of your brush as you please.
6) Move the brush to where you want on the picture. (Note: you CANNOT move the brush once you've placed it on the picture without undoing and redoing all over again.)
7) Now add any text around the image as you want!

1) Click the "text" tool in photoshop. It will look like this:
And.....
Congratulations, you now have your very own watermark!
Was this post helpful? Easy to follow?
No comments:
Post a Comment